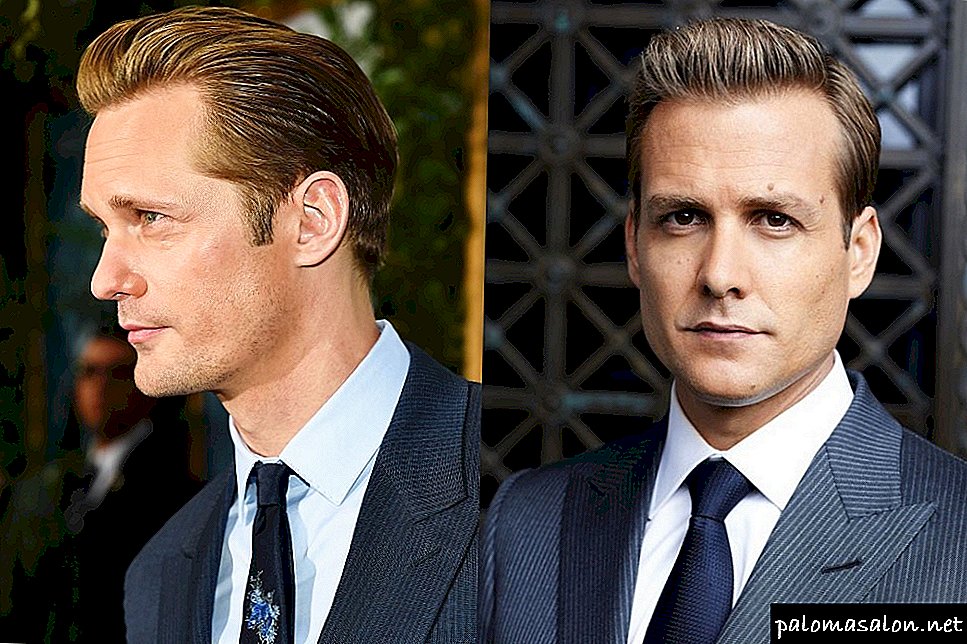
A regular hair straightener allows a woman to change her image depending on her mood and reason: to create voluminous curls or make her hair perfectly smooth and straight. Its main purpose is to straighten hair, however, nothing prevents you from making fashionable Hollywood waves or loose curls, elegant curls or small curls with its help. Hair curls with an iron for long hair are more stylish and shiny than with a curling: plates ironing simultaneously smooth and twist the strand, giving it a natural glow.

What iron need?
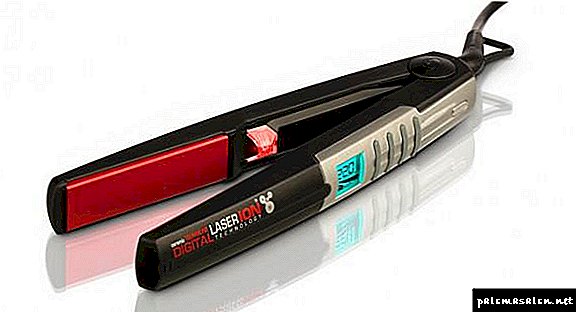
Choose a tourmaline or titanium coating plates - they are more modern, safer and less traumatic, in extreme cases, pay attention to ceramics (including advanced with an ionizer). The first two covers cope even with a hard type of hair - they curl it well and with high quality and give a long “curly” effect. It is good if the “device” has a function to adjust the temperature depending on the thickness and condition of the hair. Experts recommend choosing the following temperature regime for the type of hair:
- 160-180 degrees for thin or damaged, bleached hair,
- 180-200 degrees for normal, not too thick, natural hair,
- 200-220 degrees for thick, hard and thick hair.

If we talk about the size of the plates ironing, then choose it depending on the thickness and length of the hair and the effect that I would like to get. Thin plates are suitable for working with thin hair, wide - with thick or very long.
For long hair, the optimal choice will be an iron with wide plates and rounded edges, with which you can create both small and large curls.

How to make curls?
Creating a hairstyle begins with preparing the hair and washing it: it is on clean hair that the styling lasts a long time and looks decent. After washing, be sure to use a washable moisturizing balm or mask, and before drying hair and curling - a thermal protective agent in the form of a spray (cream or gel will make the hair heavier, which can lead to quick straightening of curls). Even if you do not use a hairdryer, you need to completely dry your hair and only after that start the “hot” work.

Thermal protection can be applied immediately before using an improvised curling iron, especially if you do not use a hairdryer. Such tools protect hairs from mechanical damage and additionally help to fix the hair.
How to do:
- Pre apply mousse or foam to dry hair to fix curls - the tool will extend the life of hair, especially if they are difficult to style, too heavy or naughty.
- Divide hair into 4-6 sectors. depending on their thickness and secure each of them with a crab or any other fixative.
- Start twisting curls from the lower sector from the neck to the temples. It is convenient to divide the head into two halves and work with each in turn.
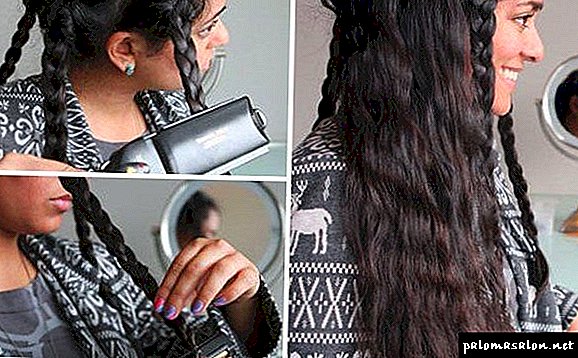
- Grab one strand by ironing, retreating 2-3 cm from the roots.
- Turn the iron 180 degrees around your axis away from your face and move it vertically down, holding the tip with your free hand. Do the same with each strand.
- After creating the curls spray them with hairspray, fix curls and with your fingers, beat the hair at the roots.
How to choose a flat iron

Hairdressing irons are domestic and professional. Modern technology has brought the parameters of household appliances to the models of professional series, so now you can choose a relatively inexpensive iron with very good technical characteristics.
What parameters should be guided when choosing ironing? The principal characteristics are:
- The material of the heating plates.
- Type of thermostat.
- The shape and width of the heating plates.
Selection with focus on the coating plates

- The worst option is cheap appliances with metal plates: they dry out and pull out strands. Regular use threatens the health of curls.
- A good option are irons with tourmaline plates. They belong to the middle price category and are safe for hair. In the process of heating, tourmaline, which is a natural mineral, emits negatively charged ions that have a beneficial effect on the strands and reduce their electrification.
- Most often, consumers buy irons with ceramic plates: they are inexpensive, comfortable and completely safe. The only drawback - sticking of the styling products to the surface of the plates - is easily eliminated by wiping with a damp cloth.
- Devices with marble-ceramic heating elements are a bit more expensive, but even safer for hair. This is explained by the harmonious interaction of the plates: the ceramic heats the strand, and the marble cools.
- Teflon-coated irons most often belong to the professional series. Their properties are close to the devices with ceramic plates, but the means for styling does not burn to them.
- Titanium coating of heating elements has both pros and cons. The high temperature and uniform heating of the plates allows the use of these devices for keratin straightening strands. In the same time titanium irons are short-lived, expensive and can dry out hair.
- Jade coating allows even strands to be straightened, spares hair, and styling lasts long enough.
- Antibacterial silver-coated devices have a lasting result and a healing effect. However, the use of nano-particles significantly increases their cost.
- The most expensive are irons with plates of tungsten. Uniform heating of the plates occurs in seconds. The styling is durable and does not require styling products.
Selection by type of thermoregulation
Good ironing supplied thermostats, which are:
- Mechanical. Their main drawback is the impossibility of establishing the exact temperature of heating.
- Electronic. Temperature setting is carried out with an accuracy of one degree, however, when the device is turned on again, this procedure will have to start from scratch.
- Equipped with the option of memorizing temperature. Thermoregulation in such irons is not only accurate, but also convenient: you do not need to adjust them after each shutdown of the device.
If after using the ironing, the hair breaks and splits, then you need to choose a different thermal protection and set the lower temperature on the device.
The degree of heating of the plates depends on the thickness and structure of the curls. The maximum ironing temperature for thin and loose strands is 160 degrees. For thick and curly curls, this figure should be increased by 20 or even 40 degrees.
Selection based on the width and shape of the heating elements
When choosing a hair iron, it is necessary to consider the length and thickness of the curls.
- For styling rare hair reaching the shoulders, the device with a two-centimeter width of the working plates will suit. Thick strands of the same length require a width of 2.5 cm.
- You can lay a long but rare head of hair with a device with a 5-6 cm wide working area. Thick and wavy strands will require ironing with plates of 7-9 centimeters width.
For domestic use are very convenient mini-ironing with a very narrow work area. With their help, you can lay not only strands in different parts of the head, but also rather short bangs.

The shape of the working plates affects the nature of the installation.
- It is best to make hair tips with a rounded plate.
- For perfect straight strands, you should choose an iron with a flat shape of the working surfaces.
Pre-Curly Actions

- Wash your hair before winding it up and dry it well (preferably without a hair dryer).
- The use of styling foam or mousse will prolong the existence of hair.
- The use of the iron requires the obligatory application of a special thermal protective balm or spray. It is applied after the foam. When using a high-quality rectifier with ceramic or jade plates, this procedure can be ignored.
- Hair is carefully combed and divided into separate strands, fastening them with small crabs or clips.
 If you want to learn how to make a haircut in kindergarten with your own hands, we advise you to read our article.
Can hair fall out because of thyroid? Yes, the thyroid gland often causes alopecia.
If you are interested in the question, which shampoo is better from dandruff, you will find the answer to your question here http://ilhair.ru/zdorove-volos-i-kozhi/lechenie/obzor-aptechnyx-shampunej.html
Curling short hair

- Tcarefully combing the hair, it is treated with a heat-shielding gel or spray.
- While the iron is warmed up, the hair is divided into several parts and fastened with clips. The direction of the wave - from the upper to the lower curls.
- Separating the thin strands one by one, lay them between the heated plates and iron them in one continuous twisting motion. It is impossible to delay the straightener on the hair for a long time: this can lead to their drying out.
- Starting from the top, go to the temples, then to the back of the head.
- The use of an iron on short hair leads to a very voluminous and feminine hairstyle.
Creating curls locks medium length

Girls with such hair can create styling with curls at the ends or curls for the entire length of the strands. Here's how to perform the first option hairstyles:
- On clean and well-dried hair apply a heat protective agent.
- Thin strands seize the iron almost at the very roots and straighten with one sliding movement, and having reached the tips, they twist them upward.
- Alternately podviv all the ends, styling sprinkled with varnish.
If you want to learn how to get rid of split ends of hair, we advise you to go here http://ilhair.ru/uxod/maski/prostye-i-effektivnye-v-borbe-s-sekushhimisya-konchikami.html

The second variant of laying is done a little differently:
- The wax-treated strand is grabbed, slightly backing away from the roots.
- Having unrolled the iron by 180 degrees (towards the roots), they slide through the hair, keeping it at an angle to the head.
- Having reached the tips of the hair, they are additionally twisted.
- On the finished curls put varnish and gently straighten hands. Use the brush can not.
Curling long hair

The use of hairdressing ironing on long strands allows you to perform many very beautiful hairstyles.
Long hair can be wound from the middle, perform a spiral perm, make wavy and zigzag curls.
Consider the method of creating spiral curls.
- The hair treated with a thermal protective gel is carefully combed.
- Taking a strand, pinch it between the plates of the device (five centimeters from the roots) and gently twist on the iron.
- After a short wait, the straightener is opened slightly and carefully removed from the hair. The lock is held with a finger, preventing it from developing.
- After finishing the curl, curls sprinkle with varnish, beautifully distributing them on the sides of the hairstyle.
Want to make a simple, but at the same time elegant hairstyle? Then we advise you to look at the hairstyle beam on long hair, which can be done in 10 minutes.

Casual luxury

- The hair prepared and treated with a heat protective agent is divided by a direct parting.
- Separating a long curl, twisting from it a tight tourniquet. Apply styling foam for the entire length of the hair.
- Capturing the harness with a styler at the very roots, slowly moving it to the ends of the hair.
- During the minute, the plait processed by the iron is held in the palm of your hand, preventing it from developing.
- The finished curls are sprayed with varnish, easily beaten with palms.
Zigzag curls
To perform this original youth hairstyle will need a foil.

- The foil is cut into strips, the length of which is equal to the length of the hair, and the width - ten centimeters.
- Combed hair is treated with foam and disassembled into thin curls. Each curl is wrapped in a strip of foil.
- Taking the prepared curl, fold it with an accordion: from the tips to the roots of the hair.
- Placing the "accordion" between the heating plates, hold it for a minute.
- Foil can be removed only after its final cooling.
- All strands curl in a similar way.
- Laying in the combing does not need. It is only necessary to fix it with varnish.
Bulk styling

At the heart of this hairstyle lies an old way of creating curls with the help of weaving braids. This method allows you to get a whole mound of small curls, but to create them takes several hours. Using a styler will significantly speed up this process.
- The hair is slightly moistened with water or treated with styling agent.
- Braid a lot of small braids.
- Armed with a flat iron, they are treated with every pigtail.
- Dissolving pigtails, spray them with varnish.
Selecin tablets will cope with the problem of hair loss.
Luxury curls

Curls, wound in this way, are of extraordinary beauty.
- Having separated a thin curl, wind it on a finger to the very basis of hair.
- Carefully releasing the finger, the hair is fixed invisible.
- Taking a styler, for five seconds they are clamped with a ring of hair.
- In the same way handle all the other rings.
- Having finished the process, the invisible beings remove and straighten the curls.
We hope that in our article you have found the answer to the question: how beautifully to twist hair with the help of an iron.
Spectacular hairstyles using a hair straightener require certain skills from the artist. From the first time, the curls may not turn out exactly as they were originally intended, but after several trainings every girl will be able to master this process. After some time, the model of the rectifier will cease to matter: beautiful curls will be obtained regardless of the technical characteristics and parameters of the device.
What you need to know before the first application of ironing?

With the advent of hair straightener, creating curls has become much faster and easier.
With seeming simplicity, to wind the hair on different irons, you need to know a lot of secrets and intricacies, and talk about them.
Daily use of the rectifier can cause significant harm to the hair, if you do not take into account the rules to minimize it.
- Choosing the iron, it is not necessary to chase for cheapness. Remember, metal plates will quickly “kill” hair. Tourmaline or ion-ceramic coating of the plates is much more careful with the hair structure.
- It is easy to burn hair, but it is much more difficult to restore it. Before each use of the iron, treat your hair with a thermoprotective spray or thermoactive milk. Then your hair will be all right.
- Damage to the structure of the hair, when exposed to the rectifier, may residues of lacquer or foam. Therefore, before curling hair should be thoroughly washed.
- In no case can wet straight hair be straightened or curled, much less carried out one strand several times. Over-dried hair splits, becomes brittle and looks untidy.
Curls at the ends

Curls at the ends of the hair make the hair more elegant and romantic. To make them will require: iron, barrette, thermal protective agent.
- Treat hair with a means of protecting them from burns and drying. Wait until the hair is completely dry.
- Collect the hair in a bun, leaving a few strands at the base of the neck, and fasten them to the back of the head.
- From the remaining hair, separate a small strand, not thicker than a little finger. Place a strand between the hot plates, throw it up the rectifier and rotate the iron 360 degrees and slowly lower it down.
- Then proceed to curl the remaining hair.
Curls over the entire length
 To create classic curls along the entire length of the hair with an ironing no more difficult than at the ends. The only difference from the previous technique of creating curls, strand of hair must be clamped between the plates ironing at a distance of 8-10 cm from the roots.
Tip: The slower you lower the iron along the length of the strand, the steeper the curl is. You want to get soft waves, do everything a little faster. Moving unevenly, creases and excesses will remain on your hair.
The video allows you to figure out how to properly twirl hair ktsyuzhkom to get the desired effect.
Curls wave
Elegant wave of curls, first introduced by Victoria Secret, is considered one of the most stylish and feminine hairstyles. To make it harder, you have to work a little.
- Treat your hair with a heat shield. Wait until it dries.
- Divide the hair into strands and curl the iron from the roots. Curls should get tight and bulky.
- Gently brush the resulting curls with a brush, they will become smooth and freely lie along the back.
- Fix the grooves in the waves with clips.
- Apply hairspray to your hairstyle, let it dry for 10-15 minutes and fix the hair thoroughly.
- Only after the varnish has completely dried, remove the clips.
Gentle curls
 Gentle curls from the roots is easy to create in this way:
- Clean dry hair, pre-treated with a heat-shielding agent, divide into many strands, twist spirals from them. Attach them to your head with invisible bagels.
- Every bagel squeeze ironing.
- When all the bagels from the hair are ready, dissolve the hair.
That's all, now it remains to beautifully put the curls and fix the hairstyle with lacquer. Look at the photo above, it shows step by step how to twist and how the hair will look after it.
Unusual curling of curls using a brush and foil
 No less original look curls, wound with a brush and foil. Foil for this is suitable as a special hairdresser, and food.
- Prepared by the previously described method, the hair should be screwed onto the handle of a cosmetic brush. When removing the hair from the handle of the brush you will not have problems if you use a brush with a smooth and smooth surface.
- Take a small piece of foil. Put a brush on its middle (perpendicular to the foil), slowly remove the twisted hair from the brush pen and wrap the resulting curls into it.
- Clamp the foil with the hair between the plates ironing. Count to 20.
- Unfold the foil and evaluate the result.
The use of this technique of hair curling allows you to get a spiral curl of any diameter.
By the way, the size of the diameter of the spiral depends on the diameter of the brush handle. The thicker the brush, the larger the spiral.
Detailed video with step by step instructions for lovers of experiments and a new vision of winding on the iron.
How to wind hair on the iron quickly?
There is a faster way to wind the hair on the iron.
For faster curling, the prepared strand is clamped between the plates at the roots. Slightly lower the iron, slightly turning it, hold it in place for 3 seconds. Then again lower down and turn in the other direction. And further, along the entire length of the strand. At the end of the strand, rotate the iron 360 degrees sliding through her hair. The effect will be astounding.
Instructions for long hair
- Wash and dry your hair.
- Treat your hair with a heat shield.
- Insert a strand of hair in the iron.
- Turn the iron perpendicular to the curl.
- Cast the free end of the strand on the iron.
- Rotate it 360 degrees.
- Slowly lower the curling iron down.
- Fix the received curls with lacquer.
For short hair
 See the photo and video above in the article and select the appropriate option for the waves. Then proceed to preparing the hair.
Repeat the process of separating and winding each strand. Given that for shorter curls it is worth lower temperature, it is not necessary to warm up carefully. Straighten your haircut correct curls lying in the wrong direction.
Disassemble the curls or curls, lightly beat together adding volume and use lacquer to secure.
Video for a more visual representation of the whole process of curling short hair.
How to wind hair on the iron correctly?
Take a strand, clamp. Twist the strand on the plate and gently lower it along the growth of the hair. In order to avoid damage to the curl, the iron can not be stopped.
For curling square, iron should be held at an angle of 90 degrees. Based on the obtained result of the first strand, the angle of inclination of the ironing is adjustable.
What to do if you can not wind the hair on the iron?
If you are unable to wind the strand on the iron, then perhaps your rectifier is not intended for such a procedure. For curling the curls, the edges of the plates should be rounded.
Having learned to curl the curls correctly with an iron, you will always look stylish and feminine. A huge amount of waving techniques gives you room for your imagination.
Very well and in detail everything is written and shown. Just for people like me))
Very glad that you managed to help. Please tell me which version of hair curling on the ironing did you like the most? And why?
What is a hair straightener, how to choose a quality one?
Hair straightener is a device that with the help of heat exposure can give the hair the desired shape.

Hair straighteners can be divided into types according to different parameters:
- Material plates (directly working surfaces in direct contact with the hair). They can be made from:
- Metal - the most dangerous material for hair. It does not protect hair from heat at all and can heat up unevenly, which is why it seriously injures hair. Devices with metal plates have the lowest cost in the market.
- Ceramics - the most popular plate material among consumers. It evenly warms up and maintains the necessary temperature, much less damage to the hair, unlike metal. Very easy to slide on the strands. But there are also disadvantages of the ceramic surface: the products applied to the hair before using the iron make a mark on the plates and it is necessary to wipe them after each use. The price for a device with ceramic plates is much higher than that of metal.
- Titanium - coating material (it is not used independently). It is applied on a ceramic base. It provides easy gliding and additionally protects the hair from heat damage. But the price of titanium-ceramic irons is quite high.
- Teflon - is also applied to the base material of the plates as a coating. Provides easier gliding along the strands, additionally protects and smoothes the hair. Has a high price. Also, the material has one serious drawback: the Teflon coating is very quickly erased, after which the iron begins to severely damage the hair.
- Marble - only half of the plate on each side consists of this material, the second part is ceramic. The advantage of such a system is that one of the materials heats the hair strongly, and the other cools immediately, which significantly reduces the degree of damage. Instruments made in this way are distinguished by high cost.
- Tourmaline (ion-ceramic coating) - the most modern and sought-after material plates. Eliminates hair from static electricity, perfectly slides along the strands and warms evenly. Thanks to the ability to retain moisture in the hair, almost does not damage them.

The material of the plates, of course, is to choose the one that hurts the hair the least. As for the size of the plates, here it is worth making a start from the goals for which you purchase a flat iron. Wide plates are ideal for straightening hair, even if your hair is not thick and thin. They will grab a larger amount of hair and draw it out. To create curls better to get narrow plates. They will create beautiful curls or waves without sudden transitions. And in the event that you need an iron for both purposes, the acquisition of a device with medium-width plates, about 3-4 centimeters, will be optimal.
As for the shape of the plates - for whatever purpose you purchased the device, it is better to prefer the smoothed ones. Hair will not cling to them, damaged, and they will not leave wrinkles on the strands when creating waves and curls.
Additional options usually include a temperature controller, a digital display, a rotating cord, additional nozzles, etc. If you have the opportunity to purchase a model equipped with such functions, do not hesitate to do so. So you will be more confident that your hair is safe, and the process of use will be more comfortable and convenient.
Tip! When buying a flat iron, be sure to check it out, asking the consultant to turn it on and show you all the functions. And also be sure to put the plates together and make sure that they fit snugly together, as only in this case the device will fulfill its purpose.
How to wind the hair straightener: technology and expert advice
There are a number of immutable rules that experts recommend to adhere to without question:
- The thinner your hair, the lower the temperature should be at the device when laying. The same applies to loose and damaged hair.
- Very often, because of the fear that the curly hair has not yet formed, the girls hold the device for a long time. Don't do that! It simply burns your hair in the most direct sense.
- Be sure to use thermal protection before laying hot appliances.
- Never use styling products before laying with hot appliances, they are very aggressive to affect hair in a heated state.
- Do not use a comb with metal teeth when laying. And better than ever.
- Do not load the hairstyle and do not perform any manipulations with it immediately after the completion of the styling, let your hair rest, cool and consolidate in the artificially created form.
- After any thermal styling, try to avoid the sun, since elevated temperatures make hair extremely vulnerable to UV rays.
- Wipe the plates of the device as soon as you finish the styling process in order to remove the remnants of all products that could later damage your hair.
- If you often style your hair with hot appliances, be sure to let your hair regenerate, nourishing and moisturizing it with oils, masks, and other specially designed products.
And now let's talk about the techniques of hair curling using the ironing.
There are six of the most common technologies for creating waves and curls using this device:
- The method of winding strands on the iron as well as on the curling iron. The hair is clamped by a straightener at the very tip and the device is twisted into a strand of hair to the required place.


After you have learned about all the rules, nuances and basic methods of creating curls with an iron, you can proceed to their direct creation.
Phased hair styling with ironing
In order for the styling to meet your expectations, it is necessary to observe all the steps and nuances of preparing the hair and the curling itself. Of course, in a particularly emergency situation, you can do without it, but in this case, the result will be less spectacular, and the hair will be subjected to a more aggressive effect, with the result that their quality will deteriorate.
Proper washing of the hair - the first stage on the path to the perfect curls
If there is dust or residues of cosmetics before the heat exposure on your hair, you can be sure that damage to your hair cannot be avoided. Any residues of lacquers, foams, dirt and other substances during heating will penetrate deeper into your hair and have a serious negative impact on them, so it is better to spend more time on styling than to reap similar effects.

How well you clean your hair, its quality, growth rate and, of course, the appearance of your future styling depends on how you wash your hair. In order for all these indicators to have their maximum rating, you need to follow a number of rules when washing your hair before creating curls with an iron:
- It is necessary to wash hair with shampoo, which is aimed at creating volume, it is better to use conditioner also from the same series. As a result, you will get obedient hair with a beautiful volume, on which the curls will be created very simply, and they will look much more impressive than with a preliminary wash with ordinary shampoo.
- After the procedure of shampooing, rinse your hair with cold water, so you close the hair pores and after drying the curls will be elastic, shiny and docile, which will facilitate the process of curling with an iron.
- Apply shampoo only to the hair roots. The owner of whatever length you are, she is perfectly washed in the process of rinsing the product from the scalp. If you apply the product to all hairs, they can be dried out and in the process of curling with an iron the hair will be severely damaged.
- All masks, conditioners and balms use only according to the instructions and do not hold longer than the specified time so that the hair after their application does not look greasy and heavy, otherwise they will not curl at all, as they will have an excess of moisture and nutrients.
When I wash my hair in a hurry, after drying it looks dull, lifeless, very confused and impossible to put. But as soon as I do it according to all the rules, I also spend some time on the head massage - I immediately notice the result: the hair looks healthier, elastic and shiny, easier to fold and does not tangle, as a result - the curls look like I was just from the cabin.
Tip! For a stronger effect of rinsing the hair with cold water, add a little lemon juice to it, mixing the required amount of water and juice in the pelvis (for medium-length hair, 1–2 teaspoons will suffice). So your hair will shine even stronger, and in the sun curled curls will beautifully shimmer with all the tones and subtones of your hair color.
Drying hair for styling iron: rules
For the subsequent styling with an iron, it is necessary to dry the hair with a hair dryer. Hair dried in this way is more docile than those that dried naturally.
In order to dry your hair with a hair dryer for further styling with an iron, follow these rules:
- At the very beginning of the process, do not turn on the hair dryer at full power, since such a sharp temperature drop will harm your hair.
- Before you dry your hair, evenly distribute the thermally cleansing agent over it. It will protect and when drying the hair dryer and with the further curling iron. Detailed information on this can be found in the next section.
- To give the hair volume at the roots and make the future styling with an iron more spectacular, dry them in the head area, slightly lifting.
Important! Never start curling your hair with a flat iron until your hair is completely dry. Even if they are very slightly wet when curled with hot tongs, they will suffer serious damage, and the shape of the curl will subside almost immediately after the moisture has completely evaporated.

Tip! If you want to cause minimal hair damage when drying a hair dryer, throughout the process, use only the minimum temperature.
Protection and fixation
When styling hair ironing it is necessary to use special means to protect the hair and fixation. Let's take a look at each of these procedures separately in order to better understand the topic.
Protection - in this context, the protection of hair from thermal effects. It is necessary to protect the hair from the high temperature devices. The principle of the tool is to form on each hair the thinnest film that is resistant to thermal effects. Thanks to her hair does not lose its natural properties and remains healthy.
We have selected for you the top 3 best thermal protection products for today:
- Heat Protect from Syoss. It features high efficiency, supplemented by an acceptable cost - about 500 rubles. Gives hair reliable protection from heat, gloss and smoothness. Does not feel sticky or heavy.


Video: Comparison of 12 thermal protection products
Fixation - it is necessary in order that the created laying kept as long as possible in its original form. The most common fixative is hairspray, but there are others: skins, mousses, gels, etc. Among them are also those that are most in demand among consumers, we have selected for you the top 3 with the highest ratings:
- Kapous Mousse normal. The tool is presented in the form of a mousse, which helps to create the desired styling, perfectly fixes the hair in the right shape, is resistant to UV light, and also acts as a thermal protection. The price of the funds is about 400 rubles.


Considered by us means the best of its kind according to the estimates and reviews of consumers.
Additional accessories necessary for work
To create a truly spectacular hairstyle, you can not do without accessories that will greatly facilitate your work on your hair and improve the result. They are few and, at first glance, they seem insignificant, but having tried to do the styling with their help at least once, you will not be able to refuse them:
- Clips are special clips for hair used in professional hairdressing salons. They are very convenient to pick up those parts of the hair that are not currently involved in the process of laying and interfere.


In some cases, may be useful silicone and ordinary rubber, stealth, etc., so it is best that they are always at your fingertips.
Styling short hair with an iron: step-by-step instructions and tips
The feature of curling short hair is that the length of each strand gives a little room to roam. The best option for short hair is to create curls right from the roots. And also, due to the smaller amount of hair screwed on the device at a time, it is necessary to warm up the curl so as not to burn the upper layers of the strand.
Important! When creating any curls with an ironing tool, move the device smoothly and without stopping, otherwise the curls will remain on the curls.
Large curls
Large curls on short hair look very feminine and romantic and, at the same time, add a little bit of enthusiasm to the image.
- hair spray,
- iron,
- comb - tail,
- thermal protection
- clamps.
To create large curls, follow our instructions:
- After completion of the preparatory stages (washing and drying), you can proceed directly with the installation. Put the straightener to heat up, and at this time apply on your hair a product of your choice, which has thermoprotective and fixing properties.
- Divide hair into four equal parts. Fasten three of them with clips so that they do not interfere in the process of laying the first part. It should start with the lower sectors, so two of the three fixed parts will be upper.
- Now separate the strand of a small thickness and use the 2 techniques of winding the strands with an iron from the section “How to wind the hair with a straightener: technologies and recommendations of experts”. Do the same with each strand of the first sector.
- Then do the same with the second lower sector.
- The top is not necessary to dissolve. First, on one side, and then on the other side, release the small strands for winding, pinning the rest of the hair again.
- When all your hair is curled, spray it with varnish to fix it more firmly and lift your curls a little more with your hands so that their shape is finally fixed.

Important! You will be able to create large curls with an ironing only if its plates are more than three centimeters wide. If not, then you will have to use 5 or 6 ways of styling from the section “How to wind the hair with a straightener: technologies and recommendations of specialists”, selecting curlers of such a size so that the desired size of curls will be obtained.
Small curls
Crayons curls on short hair - an option for lighter and more direct girls with a cheerful character.
- iron,
- comb - tail,
- clamps
- thick pencils, skewers or tubules,
- thermal protection
- hair spray,
- styling agent.
Note! The smaller the diameter of the "curlers", the smaller will get curls. It should always be borne in mind that fully finished curls will be slightly larger than the circumference of the selected device.
To make small curls, follow the steps below:
- After preliminary preparation of hair (washing and drying), apply thermal protection, let it soak in completely, and then use a styling agent with hot appliances, such as foam.
- Also, as in the previous workshop, divide the hair into four parts, fastening three of them with clips.
- Separate a small strand from one zone from the bottom and wind it on the selected replacement of curlers. While holding the tip of the strand, warm it well with an iron.
- Do the same with all the hair.
- After all the hair is curled, spray it with lacquer and slightly raise it with your hands so that the shape will be completely fixed.

Tip! Secure invisible tip strands on the "curlers". So you do not have to hold them with your hand, and you will not have to wait for each curl to cool before starting the next one.
Safety when working with hair straighteners
In order not to be injured in the process of using hair straighteners, you should observe the following rules:
- do not touch the device with wet and wet hands,
- do not spray alcohol-containing substances near a hot appliance, for example, lacquer,
- after use, immediately turn off the device from the outlet,
- make sure that the hot device does not fall into the hands of children,
- when doing styling with an iron for hair, make sure that the hot parts are not too close to your skin and do not burn it (most often your ears, cheekbones and cheeks, scalp, fingers) suffer,
- when you turn on the device in the outlet, see that the plug is fully inserted into the outlet,
- After using the device, do not put it on inflammable surfaces and do not immediately remove it in a hot place.
If you follow these rules, using a hair straightener will only benefit you.
Ways with ironing curls
In the procedure itself modeling curls straightening forceps, there are a couple of nuances, which we now talk about. This is not so scary if you study the step-by-step procedure and video material:
Step 1. Set the desired temperature mode,
Step 2. Decide on the level of perm - from the root or to the middle length. We bring the straightening curler vertically to the head and clamp a strand of hair between the plates. Here we must take into account that if the strand is thin, the styling is more beautiful and lasts longer,
Step 3. Next you need to iron the iron towards the roots of the hair, make a full circle,
Step 4. Slowly descend with an iron to the tips, just as during straightening. Due to the fact that the rotation was made around the axis, the hair will be twisted, and not straightened. It is important to correctly twist the hair immediately, so as not to run high on the strands twice.
There is one trick: the slower you run the ironing, the stronger and more pronounced curl.
So step by step should wind all strands. This ordinary version takes about 15 minutes of time, provided that the average thickness of the hair. Do not be afraid to fix the styling varnish, but do not be zealous. Sprinkle when all the curls are ready, not one by one, otherwise the varnish may accidentally fall on a flat strand, then the iron will stick to it when winding. Varnish also needs to pick up the level of fixation that you need: medium, weak, super fix .. As a rule, the level is always indicated on the bottle.
Spirals of several sizes with pencil and straightening tongs
Video:
Match your length and desires, otherwise there will be surprises. If you do not take into account the features, as a result, the hairstyle can add sharpness, growth and completely spoil the appearance. Trying to wind yourself up? - Remember:
Plate coating
There are the following coating plates ironing:
- metal. They are least popular because they distribute heat unevenly and can burn hair. The cheapest. You can purchase if you plan to use the rectifier no more than once a month,
- ceramic. Most Popular. Well distribute heat, spare strands. Minus - long bask,
- Teflon. Suitable owners of soft hair, as well as gently affect the curls,
- ceramic tourmaline. Sparing, well distribute the temperature, smooth the hair scales, remove the statics,
- titanium. Heavy Duty. Additionally possess all the properties of ceramics,
- marble and ceramic. Combine the above properties of ceramics. A distinctive feature is the ability of marble to instantly cool the heated strand. This allows you to minimize the harmful effects of temperature.
Plate width
The width of the plates varies from 2 to 8 cm. As a rule, the choice should be guided by the features of the hair: the thicker and longer it is, the larger the plate size should be.
But here, too, it is necessary to take into account the fact that curling the curls with a very wide ironing will not work. Therefore, if you plan to use a straightener on long hair for curling, stop the choice on the average width: 3-4 cm.
Read on our website: how to choose the right hair straightener.
What you should pay attention to
In order to create curls with an iron, choose straighteners with rounded plates, they will prevent the formation of wrinkles when curling. In addition, immediately pay attention to whether there is a gap between them when they are connected to each other.
Equally important is the selection of the optimum temperature, therefore It is better to choose a device with a thermostat. If this is not possible, give preference to the iron, which heats up to a temperature suitable for your hair.
So, for damaged, dyed and thin strands, the device that heats up to 150 degrees will suit. Normal hair temperature allowed exposure to 180 degrees. And the optimal heating (up to 230 degrees) is better to use on hard, thick curls.

Council If you are going to create hairstyles with an iron on long hair, choose a curling iron with a rotating cord. This will avoid its entanglement in the process.
An additional advantage will be such a function as floating plates. They adapt to the density of the strands and take a position that allows you to work on the hair evenly around the perimeter.
There are also stylers with additional nozzles: corrugation, curling, comb, and more. Thanks to them you can do diverse hairstyles.

Terms of use
Regardless of the way you wind your hair on the iron, It is necessary to adhere to the basic rules of using the device:
- Perm do only on clean and well-dried hair. Using a styler on wet strands will cause them to be injured,
- be sure to apply, before laying, thermal protection,
- for better fixation process the hair with foam, gel or mousse,
- the thinner you take a strand to wrap, the better will be the fixation of the curl and the clearer its shape,
- as a rule, wrapping occurs in the direction from top to bottom. At the same time, the styler cannot be stopped during the curling process. Otherwise, there may be ugly creases,
- use a rectifier no more than twice a week,
- if you need to warm up the hair ironing Remember that thin and damaged strands are better not to warm up for more than 10 seconds, and thick and hard - more than 20 seconds,
- To avoid unwanted pomp and unwinding of the strand, you should not comb them after wrapping. Simply spread your fingers well.
Techniques cheating
A quick way to get light, careless curls in the spirit of "beach" curls. Depending on the thickness and condition of the hair, the time it takes you 0.5-1 hour.
How to make curls ironing by twisting the harnesses?
- Prepare curls, process them with styling agent.
- Separate the small strand and twist into a tight harness.
- Press it with the iron and warm up for 5-15 seconds.
- Walk along the entire length of the rope.
- Process in this way the entire head of hair.
- Shake curls with your fingers and varnish.

Wrap on styler
One of the most popular ways to wrap hair with a flat iron on long (and medium length) hair. It will take a lot of time: up to two hours. But curls turn out easy, noticeable, effective.
How to wind? Using the instructions in which the steps of the wave are described step by step:
- Divide all the hair into comfortable areas and clip the part of the hair that you will not use in your work.
- The remaining section is divided into thin strands and proceed to the wrap.
- At a distance of 10-15 cm from the root zone, clamp the separated strand between the plates of the heated iron. Styler position - perpendicular to the curl.
- Scroll the rectifier around its axis 360 degrees. When properly positioned, the tip of the hair will “look” down.
- Pull smoothly down the iron, trying not to stop.
- Make such a wrap rectifier throughout the head of hair. Create curls irons in different directions, so that they do not merge, and the hairstyle itself was more magnificent and effective. Cheat front make from the face.
- Shake finished curls with your fingers and fix with varnish.

Warming ringlets
This technique is suitable for owners of thin, sparse hair. Time it will take from one to two hours, and the curl itself is as follows:
- Pick up the narrow strand in the forehead and wind it on your finger, starting from the tips. Direction - from the face.
- Secure the resulting ring with a clip at the roots and make the same rings over the entire head.
- Warm each curl with a straightener and wait until they cool completely.
- Unwind the curls, shake with your fingers and spray with varnish.

Classic way
Allows you to get a large and neat spiral, as well as the effect of Hollywood curls, the creation of which will take about two hours.
How to do:
- Divide the hair into zones.
- Separate the narrow strand and pick it up with an iron, placing the heated styler in the direction to the side.
- All the while turning the rectifier 180 degrees, gently lower it down. Thus you will constantly twist strand in the process.
- To create Hollywood curls, wind them in one direction. Well, if you need a more relaxed perm, wrap in a different direction. Remember that front curling is better to do from the face.
- If you created Hollywood curls, ready curls comb a comb with rare teeth. In another case, shake the curls with your hands and fix it with varnish.

Pencil waving
This method allows you to get elastic spirals, giving pomp and volume of hair. Be prepared for the fact that the process is long and, depending on the thickness of the hair, will take 2-2, 5 hours.
How to do:
- Separate the thin strand and wind it on a pencil, starting from the roots, in the form of a spiral.
- Press the curl at the very top of the pencil and warm it for 5-15 seconds.
- Walk through the entire curl on a pencil.
- Carefully remove the pencil from the formed curls-spiral and curl the rest of the hair in the same way.

Zigzags (broken curls)
To create zigzag curls, you will need a foil cut into rectangles (the width is equal to triple the width of the taken strand, and the length - the length of the curl itself), as well as time (about an hour).
Stages of work:
- Separate the strand and place it in the middle of the rectangle of foil.
- Wrap the curl with foil on both sides and fold it with an accordion, starting from the tips.
- Warm up the resulting small rectangle with a styler, and then straighten the “harmonica” so that you get the zigzag you want to see on the final hairstyle.
- Leave the curl to cool in the foil, making a wrap on the remaining strands.
- With the cooled hair, remove the foil and gently comb your comb with sparse teeth.
- Fix varnish.

Retrocudry
You can make curls in retro style like this:
- Position the iron perpendicularly wound strands and pick it up from the roots themselves (the selected beam should be wide, equal to the width of the desired retro wave).
- Lift the styler up and hold it in that position for a few seconds.
- Catch the same strand just below and lower the rectifier down. Hold for a few seconds. If you are doing everything right, you should have a soft broad wave.
- Walk this way along the entire length of the strand.
- Curl such waves all over your head, trying to create them at the same height from the roots, in a single, invisible line.

Note, it takes a little time to create retro waves (up to an hour), but the result is light, careless curls with a natural effect.
Safety regulations
Modern manufacturers create devices that make their use as comfortable and safe as possible, and yet do not neglect certain rules in their operation:
- do not leave the included styler unattended,
- Try not to touch the heated plates with your hands to avoid burns. For extra protection you can buy heat-resistant gloves,
- Do not put the iron on a flammable surface, and do not cover it,
- Do not use the rectifier in the bathroom.
To wind the hair with an iron, it is not necessary to contact the master. Get beautiful curls on long hair can be at home, using a minimum of available tools.
Enough to master the existing technology and a little practice. And then you can easily cope with the creation of an effective styling for each day and for a bright, memorable publication.
Popular methods for long-term curling hair:
- perm hair:
- spiral chemistry
- wet chemistry
- radical chemistry,
- biowave hair:
- biowave Estel Niagara (Estel Niagara),
- Сhi Ionic silk biowave,
- biowave Paul Mitchell,
- Japanese perm,
- keratin hair curling.
Preparation for carrying out a wave: important rules
Stylish hairstyles at home do not just, but possible. To make beautiful curls with an iron, you first need to properly prepare the strands:
- Wash your hair with a balm or conditioner - so they will become more docile and elastic.
- Use heat protection sprays and cream, apply special serums and oils on the ends of the hair - this will prevent their dryness. Too hard and unruly curls are recommended to grease with foam, mousse or gel before laying.
- Wait until the funds applied to the strands are absorbed, and the curls themselves become completely dry. And only now you can begin to curl curls ironing.
It is worth remembering, the thinner the strands, the longer the curls hold. But if you do everything right, then the hair on thick enough curls will be resistant.

Ironing ironing strife
Curls for curls on sale are different - each device has its own functionality, type of coating, method of application and price. Is there any difference in something besides cost and heating modes? Of course - and this is the coating material. For girls and women who are concerned about the health of curls, we recommend choosing high-quality appliances with a safe heating surface.
Available options:
- Metal - this coating is the cheapest, but it does not provide adequate protection for the hair.
- Ceramics - ceramic spraying is the preferred choice for healthy hair.
- Teflon - Teflon coated models are the safest, but they cost a lot.
- Tourmaline is an even more modern and expensive option than Teflon. By the way, tourmaline coating prevents electrification of hair.
- Ion ceramics - this coating is the most advanced. This is a new generation of ceramics, which helps to normalize the water balance of the hair shaft, protects the strands from the negative effects of high temperatures.
Thus, the emphasis is on cost - curling iron with an ion-ceramic coating is an ideal choice, but not everyone wants to buy it because of the high price. Metal is a budget option for testing, but it significantly loses to everyone else in terms of safety for hair health.

Preparation for curling strands
Curling curls using irons is quite simple and more secure than curling. The ironing has a large working surface area, which allows you to do the styling quickly. To create curls, it is better to use a styler with rounded plates. Today, all irons are produced with a ceramic coating, which allows little to injure hair. Yet it does not hurt to take care of your hair and prepare it for the procedure. Follow these tips:
- Before shampooing, wash your hair with shampoo.
- For moisturizing, take a mask, conditioner or balm.
- Use a cream or spray for thermal protection. Dry ends of hair nourish with hand cream or face cream.
- Apply a small amount of foam, mousse or gel to tough, unruly, poorly-styling strands.
- Wait until the head is completely dry and soak up all means.
- Turn on the iron and wait until it warms up to the desired temperature.
- Divide the hair into fine strands. The thicker the strand, the less curl lasts.

Required fixtures
What do you need? To curl curls with a straightening styler, prepare the following tools and accessories:
- suitable shampoo and other hair care products,
- towel,
- hair dryer
- comb with rare teeth,
- styler (iron),
- clamps invisible,
- foil,
- varnish and powder for hair.

Execution of large curls
How to twist curls with an iron to make them fashionable, large? The size of the curl depends on the width of the plates of the heater. The iron with large plates makes voluminous curls. The temperature for heating the styler is set depending on the type of hair. Fragile and thin strands are best wound at a temperature of 150-170 ° C in order to avoid strong damage. For thick and dense hair, it is better to warm the iron to 170-200 ° C. Then follow these steps:
- Divide all the hair into sections (from 3 to 5 pieces).
- Grab one strand with a flat iron, turn it around its axis and guide it vertically.
- Slowly pull the strand down.
- Do the same procedure with other hair.
- As a result, you will get beautiful spiral curls of large size.

Beautiful curls ironing
In order for the curls to turn out beautiful, the styler plates need to be guided smoothly, pressing lightly on them with your fingers. Strands should be heated smoothly and evenly. First wind the strand after strand of the lower tier of the hair, then proceed to the parietal part. Separate each other with partitions.
The most important point - turn the iron necessarily in the direction from the face. Do not brush the curls, let them cool. This will allow the curls to keep their shape for a long time. To give elasticity and volume sprinkle special powder on the roots. Then lower your head down, throwing back the curls. Use your fingers to lightly brush the curls. You can fix strands near the face of invisible on the back of his head. You will get a luxurious cascade of curls.

Hollywood styling for long hair
Glamorous divas wear luxurious curls, curled from the face, resembling a waterfall. Many girls want to be like secular beauties. Run Hollywood waves is quite possible to iron. Smooth curls are considered the most elegant. They look very stylish.
So, first carefully comb all hair. Put on them the means of thermal protection and fixation. Divide the entire hairline into strands of 3 cm. Lift the first lower strand upward so that it is perpendicular to the head. Then clamp the iron in 2-3 cm from the roots, turn it 180 ° in the direction of the future curl. Smoothly hold the styler down to the very end. Wrap curl in curl hot and fix the clip near the head. In a similar way wind and fix all locks. Allow hair to cool for 10 minutes. Then remove the clips.
Now follows the painstaking procedure of laying a Hollywood wave. You will add a special chic to the hairstyle by following these tips:
- Wave to one side. To do this, remove one clip from the side where the hair falls.
- Then remove the clips from the rest of the curls, starting at the bottom.
- Comb with large teeth comb all the curls to the side.
- Use your hands to give your hair the necessary smoothness.
- Scroll each curl a little at the roots for volume.
- Comb treat the top layer of hair, without touching the roots.
- Form a Hollywood wave with clamps, directing them in the opposite direction to each other.
- Fix the entire hairstyle with lacquer.
- After a few minutes, carefully remove the clips.
The perfect hairstyle for the evening out is ready!

Cheat curls ironing on medium hair
Every owner of medium hair can handle styling with a straightener. Mostly suitable for this length of beach curls. How to perform curls ironing on medium hair? First, the hairs should be combed and divided into small strands. After that, twist each strand with a flagellum and clamp it with a flat iron for a few seconds. After winding each harness, straighten the curls with your fingers and spray with varnish. This charming styling is suitable for a summer stroll along the promenade.

Creating curls on short hair with an iron
Even on short strands, it is possible to perform neat or careless curls with a styler. Haircuts bob and square with the help of ironing become more voluminous. If you experiment with the parting, you can achieve interesting styling. For short hair suitable iron with thin heating plates. If the strands do not exceed 10 cm, then you need to wind them up from the top of your head, then go to the back of the head. Tighten very short strands in one motion under the bottom and hold for 5 seconds. To curl short hair at the back of the head, use a mirror.
For a short head of hair you can use the following types of curls curl using irons: for volume, vertical large or small coils, beach waves, winding from the face.

Slightly wavy small strands
Do you like wavy hair, but at the disposal of only 10-15 minutes? How to quickly create a lot of curls on the head using the ironing very quickly? To do this, we need to remember many familiar technology of winding with the help of braids. It is executed in the following way:
- moisten hair lightly
- divide them into 5-6 parts
- weave a pigtail from each part,
- with the blades, smooth the iron slowly over each pigtail,
- let the pigtails cool down a little, then unwind them,
- Use your fingers to brush your curls and fix them with varnish.

Reviews of unusual technology create curls irons
There is a very unusual way to create a curls straightener. For this procedure, need studs or foil. Such winding will make even the thinnest hairs voluminous. Here is the sequence of this styling:
- Divide hair into thin strands.
- Wind each of them on the finger.
- The resulting curls fasten on the head with pins or wrap them in foil.
- Heat the iron and squeeze each created roller with plates.
- Allow the curls to cool slightly.
- Remove the studs or foil.
- Swipe your fingers through your hair. Please fix the style with hair spray.
Many girls can’t get the hang of doing curls with a flat iron. To do this, it is advised to take the most thin strands for winding. It is worth noting that curls made in this way, hold on much longer than usual. It is very important to use good moisturizers before using the iron. Most often, the curler styler is heated to 180 ° C. This method is suitable for young mothers and women with a catastrophic shortage of time.
Curls created by the iron, suitable for everyday and solemn styling, for all types of hair. If you have strands naughty, curly, then they should be straightened before curling. Any beauty or stylist has a straightening styler in her arsenal. After all, it will serve not only straightening and smoothing, but also creating Hollywood waves, giving volume to short hair. The iron has already pushed the tongs and curling pens to the background. Curls created by the iron look natural. Such ceramic heating tools glide very easily through the hair, so working with them is a pleasure. The most convenient is an iron with thin, slightly rounded edges.
How to properly curl curls with curling
When making hair curls at home, consider the following points:
- Styling method should depend on the type of hair - damaged, overdried curls, it is desirable to curl the iron on a safe mode.
- To get elastic curls, set the maximum ironing temperature (usually 180 degrees - plus or minus) and grab the strands up to one centimeter in the girth.
- Flowing natural waves are obtained at an average temperature and a large thickness of curled strands.
It is easy to apply these recommendations in practice, but the model must be equipped with a thermostat that simplifies the task of monitoring the operating parameters of the device.

How to wind your hair with an ironing, what ways are there?
Hairstyles at home With the help of curling-ironing, you can make the most diverse, surprising others with new styles almost every day. The main thing is to choose a good tool, strictly follow the recommendations on how to make curls with an iron of the desired size and never curl under-dried curls.
Body waves
Consider how to wind the hair so that they are voluminous and beautifully fall on the shoulders:
- Install a corrugated nozzle on the iron and turn on the device to work in medium mode.
- Start alternately lifting each strand of hair two to three centimeters thick. Grab strands preferably from the roots.
- Hold the curl, lift it up and hold the iron for 10 seconds.
The curler without a grooved nozzle can be used, but the waves in this case are not so beautiful.


Large Hollywood curls
Making large Hollywood curls is not only smart, but also practical styling. She brings the dynamics to the image with jeans and sneakers, as well as Hollywood curls made by an iron look elegant and sophisticated with a business suit and a cocktail dress.Such styling is best done on the hair of the same length. If you have a multi-stage haircut, we advise you to look at other hairstyles.
So, how to create Hollywood curls? First, decide where the parting will take place. For such styling is preferable that option when the hair is laid on its side.
- Before you twist your hair, we remind you that it is worth checking whether they are completely dry, otherwise you can burn curls with a hot iron.
- Position the iron closer to the roots, twist the strand longer around the rectifier, and slide the tip between the plates.
- Stretching the styler along the entire length of the strand, gently holding the tip with your fingers. The slower the iron moves, the more round the curls turn out.
- When we reach the ends of the hair, slightly curl the curls with an iron.
- When all the locks are curled, apply a little lacquer on your hair, and give it a beautiful shape, gently straightening your fingers in the direction of the face. If you want the curls to remain in this state longer, then spray varnish on each strand after winding the iron.
Beach curls
How to make curls ironing on short hair, we figured it out. Let's now see how beautifully lay long strands. "Beach" curls, with the help of an ironing look natural, sexy and are created very quickly. To make them:
- Divide the hair into fine strands, lay each strand in the form of a rope.
- Walk along the entire length of the hair ironing from top to bottom.
In order for the harnesses to be tight and sturdy, we advise you to keep the curler vertical when processing them. In order to make the curls resistant, it is necessary to divide the hair into thin strands, and then we straighten each bundle with a flat iron. We advise you to start curling the hair from the back of the head. Next, go to the temporal part, and move to the bottom of the head. Thus, all locks are processed evenly.
The tips can be twisted, and you can leave as is. The main advantage of the "beach" perm - even on very long hair you make it a maximum of 15 minutes.


Large curls
Let's take a look at how to twist the hair so that you have large, tight curls:
- Hair is divided into 5-6 approximately equal parts.
- Each strand is wound onto a curling iron and held for 15 seconds.
Since the curls you will have only 5-6, the creation of styling will take a minimum of time. Curls will last longer if you make them on a foam or mousse, and then sprinkle with varnish.


Want something special?
Then your choice is the original waves. They are created almost the same as usual - the hair must be divided and curled, but in different directions. Waves will be soft, natural and more voluminous than with the usual classic styling method. The advantage of this option is that it is suitable for hair of any length.


How to make broken curls with an iron
Zigzag curls are very popular now, they look unusually on long hair and on lokan of medium length.
In addition, to make such curls ironing is very simple.
- In order to wind the hair, take a rectangular piece of aluminum foil, equal to the length of the strand, and twice as wide as its width.
- A well-combed strand needs to be wrapped in foil, resulting in a flat and narrow envelope. Hair from under it should not hang around.
- We fold the envelope with the harmonica, and at the same time, it is worth starting from the end of the strand.
- In this form, the curls are warmed with a flat iron, for 4-5 minutes.
- Removing the rectifier, lightly pull the tip of the strand down so that the zigzag is obtained.
- Next, just wait until the foil is completely cool and remove it.
Finished curls-zigzags need to be separated with your fingers, and put in the hair. Combing is not necessary. At the end sprinkle curls with varnish.
It is important to know
What is the difficulty of creating curls ironing at home? You will have to get the hang of it. A bad device will play a cruel joke with you - not only will it be bad or just wind up your hair unevenly, it can also burn them. So exercise, be careful and do not skimp on your beauty.